
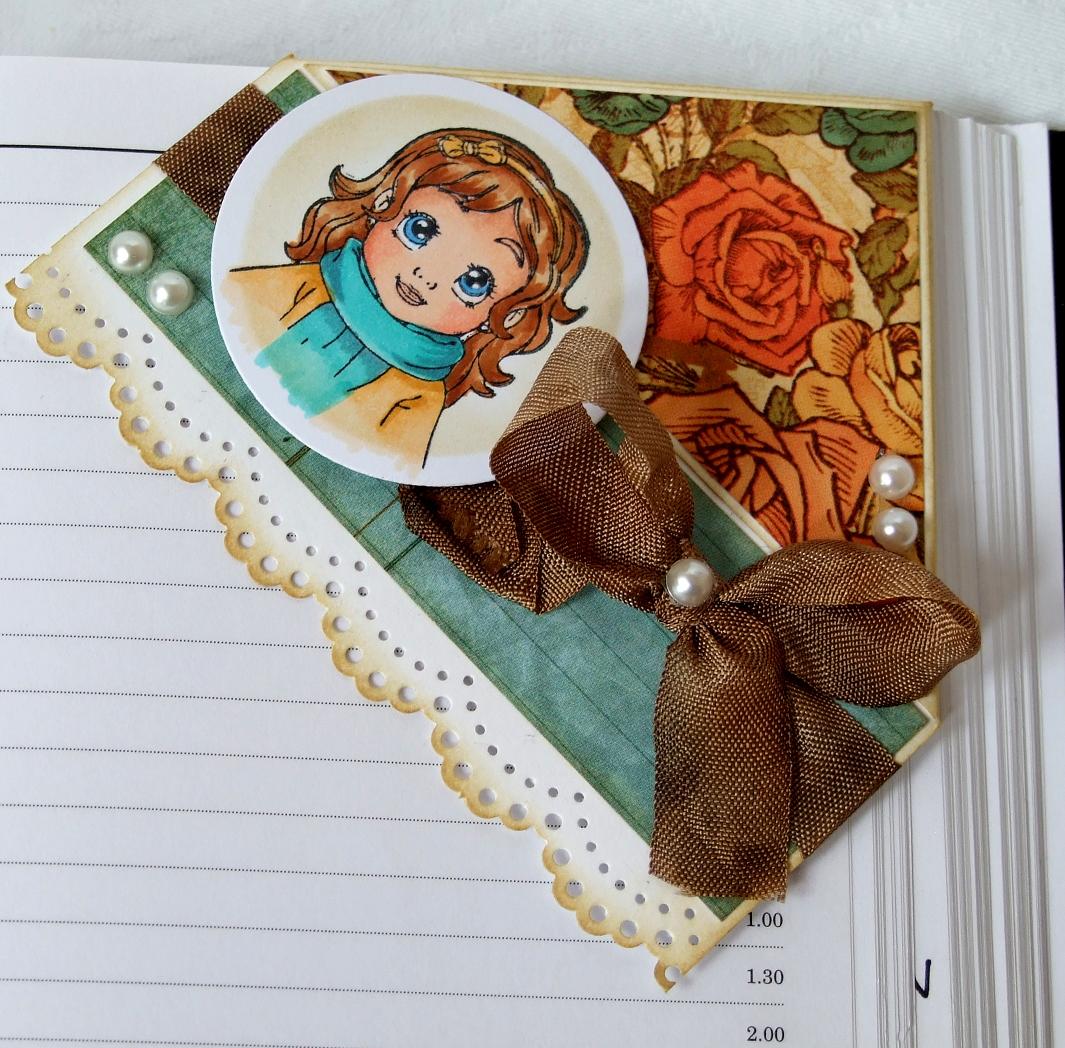
Hi! Today I am going to share with you how to make a corner bookmark. I must confess that this is the first time I've ever made one but I wanted to try something new and exciting to share with you. They are so simple to make and look really nice... great for quick gifts too!!
Supplies needed -
One 4" x 4" piece of cardstock
One 2 3/4" x 2 3/4" piece of cardstock
Scoring board
Paper cutter
One 2 3/4" x 2 3/4" piece of cardstock
Scoring board
Paper cutter
Double sided tape or other strong adhesive
Border punch (optional)
Stamp - All Bundled Up Lili
Stamp - All Bundled Up Lili
Ink or coloring medium
Additional cardstock, patterned paper and embellishments to decorate bookmark
Additional cardstock, patterned paper and embellishments to decorate bookmark

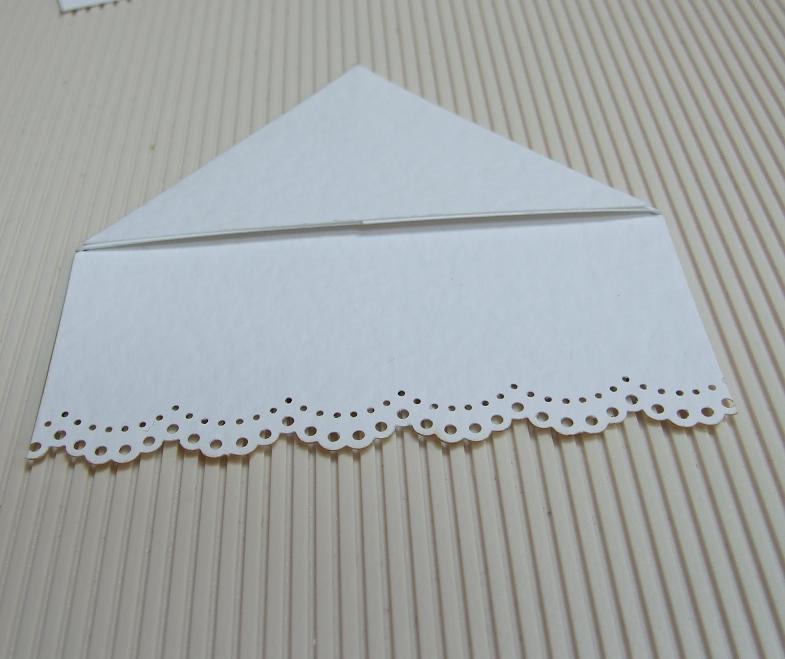
Mark the center of three sides of the 4" cardstock square.

Place your cardstock square on your scoring tool so two of the marked spots are aligned in one groove and score between the markings. Line up the other two markings and create another diagonal score line.
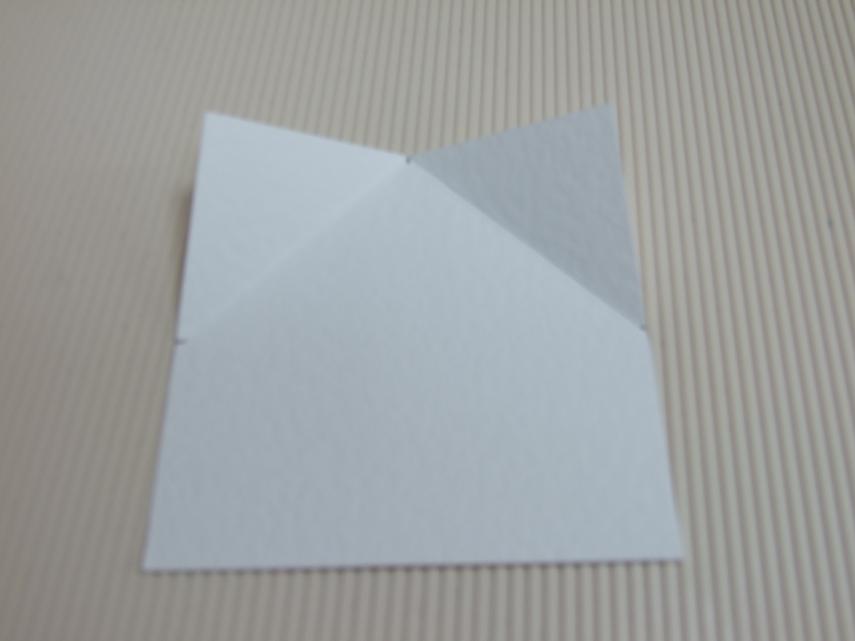
Prefold at both score lines.

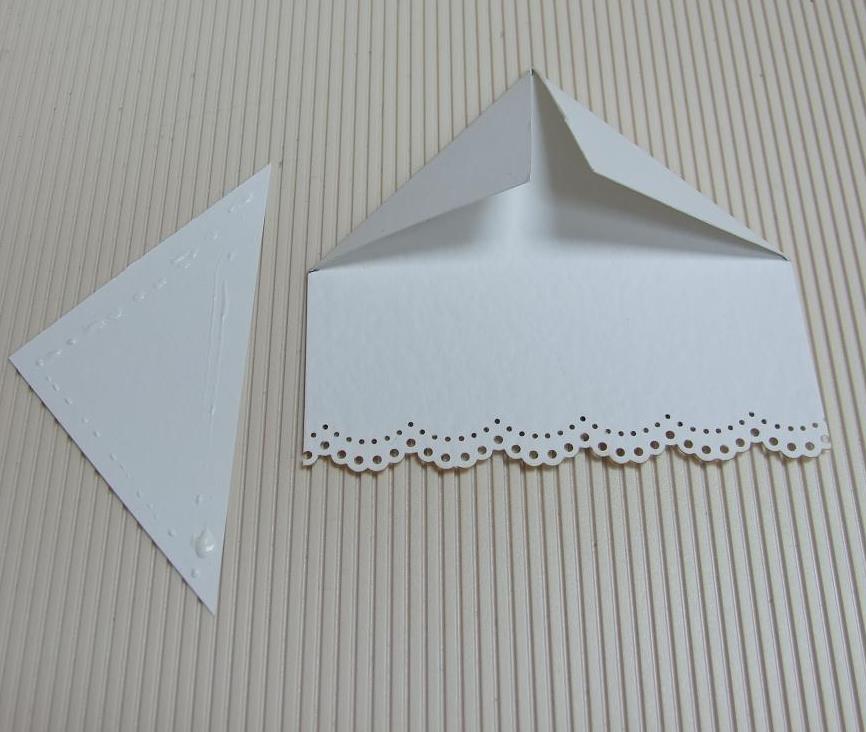
Add a decorative border to the unscored side using dies or punches.

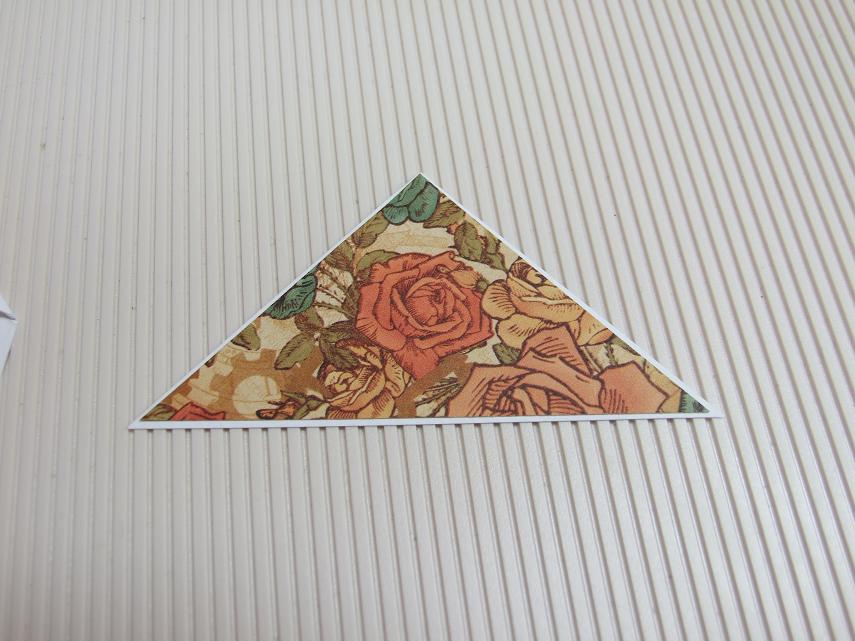
Line up the 2 3/4" cardstock square diagonally in your paper cutter. Cut the square in half. You will need both triangles.

Use one of the triangles on the front of the bookmark and decorate.


Turn the bookmark over, fold your corners back in, apply tape or adhesive to your second triangle and adhere over the flaps.
Prepare your image and cut out using circle nestabilities or other circle cutter.

Embellish the bookmark to your own taste.

and there you have it!!
Hope you enjoyed this tutorial. Have a wonderful Monday
Sandie
Sandie, this is adorable. You did a great job and thank you so much for the tutorial. I love it when people show how they made something.
ReplyDeleteHugs,
Dianne
http://mypaperhugs.blogspot.com/
Wow Sandie!! This is completely gorgeous girl!! I love your coloring and elegant papers you've used for this!! Great tutorial!! HUGS
ReplyDeleteSandie this is fab love your colour choice! thanks for the tutorial. Joey x
ReplyDelete